Introduction
This is the final example demonstrating the basics of setting up three-dimensional geometries in BUILD3D. In this example, we will import a STEP file representing a topographic surface and cut our model to conform to the imported topography. We will also create and extrude an undulating surface representing the top of our soil layer at depth. A circular tunnel will be swept along a curved path to cut through both soils.
Setting up the Analysis
Create a new SEEP3D steady-state analysis (as in the first example of this series) with metric units. Define four new Saturated Only materials named: A, B, C, and D. For this example, the properties are not important as we will only use the materials to distinguish different parts of our 3D domain.
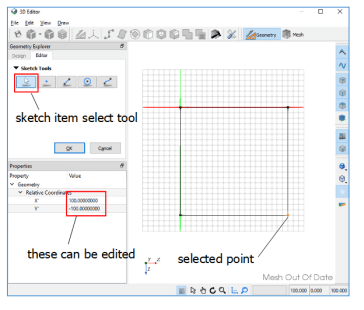
Go to Define – Launch BUILD3D. Right-click on the Top Plane and select Sketch. Sketch a square with straight line segments and corners at local (x,y) = (0,0), (0,-100), (100, – 100), (100, 0). Right-click after the last point (100, 0) to close the polyline. You may have to zoom out (using the mouse wheel) to get the entire square in the sketch window. With the sketch still open, select the arrow in the Sketch Tools and click on one of the corner points of the square. The point’s local coordinates are displayed in the Sketch property sheet and can be edited for precise placement. Select OK to accept your changes.
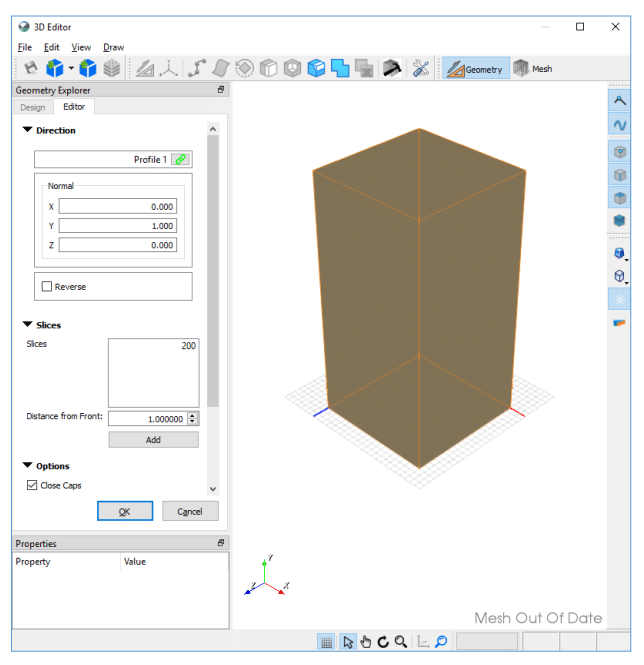
Right-click on Profile 1 and select Extrude. Create a single slice at 200. We now have a solid block that is 100 m x 100 m at the base, and 200 m tall.
Importing a CAD File
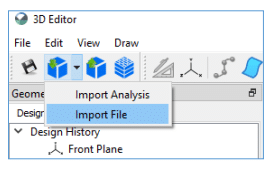
Click on the arrow beside the Import icon and select Import File. Select ‘topo.step’ as the file to import. This file (a common CAD file format) contains a NURBS surface representing our surface topography. Select OK (we do not wish to translate or rotate our imported surface).
Importing a CAD File
Click on the arrow beside the Import icon and select Import File. Select ‘topo.step’ as the file to import. This file (a common CAD file format) contains a NURBS surface representing our surface topography. Select OK (we do not wish to translate or rotate our imported surface).
In the Bodies list, select the Sheet body, which represents the imported topographic surface. Click on the Cut icon and select the Cut and Remove Tools radio button (the crescent moon shaped symbol). Because we already selected our sheet body prior to the cut icon, the sheet is already selected as our cutting tool (in the Bodies A list). If we don’t add any bodies to the Bodies B list, the sheet will be assumed to cut everything in our model (up to that point in the feature tree). Select OK.
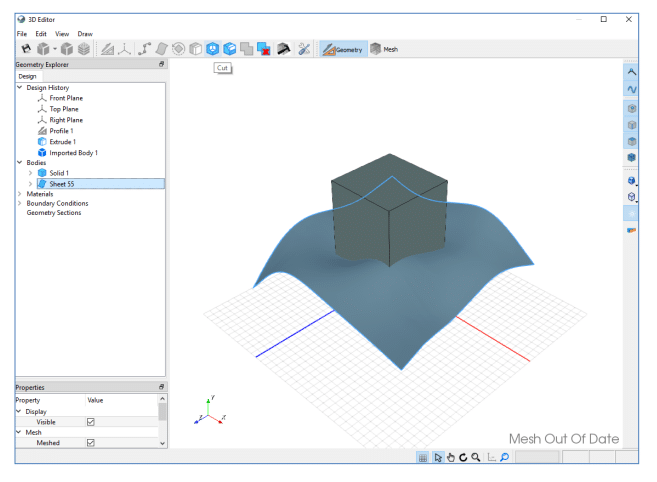
Your model should now have two solids, as shown below. In the Bodies list, select the solid which corresponds to the topmost solid in your model. Right-click on this solid in your tree view and select Delete Body.
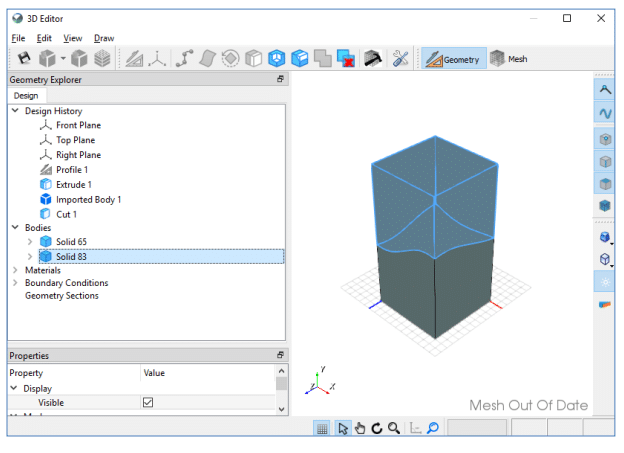
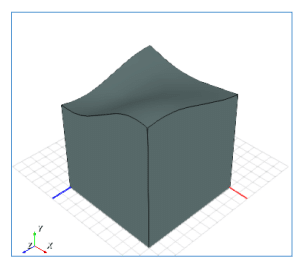
You will now have a model with the proper topographic relief.
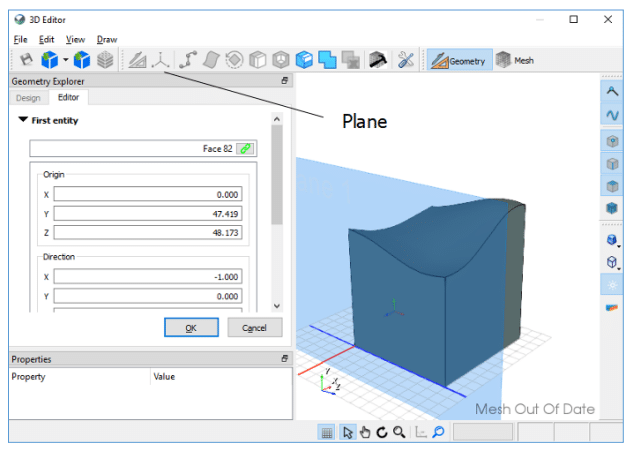
Click on the Plane icon and then on the x=0 face of your model to create a construction plane linked to that face. Select OK
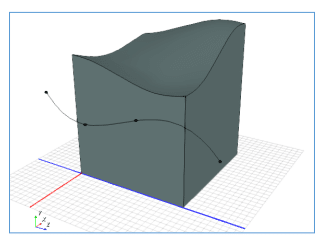
We will now draw the soil profile. In the Design History, right-click on the Plane at the bottom of your Bodies list and select Sketch. In the Sketch Tools, select the spline (furthest to the right, next to the circle tool) and draw a spine through points at the local (x,y) coordinates: (-80,20), (-40,0), (10,15), and (80,0). Click OK to accept your changes.
We will extrude the soil profile to create a sheet body and then use this body to cut through our model, creating two soil layers. In the Design History tree, right-click on the last profile you created and select Extrude. Edit the slice at 1 to 150 by right-clicking on it and selecting Edit. Select the Reverse checkbox (otherwise our slice will be extruded in the wrong direction), and press OK.
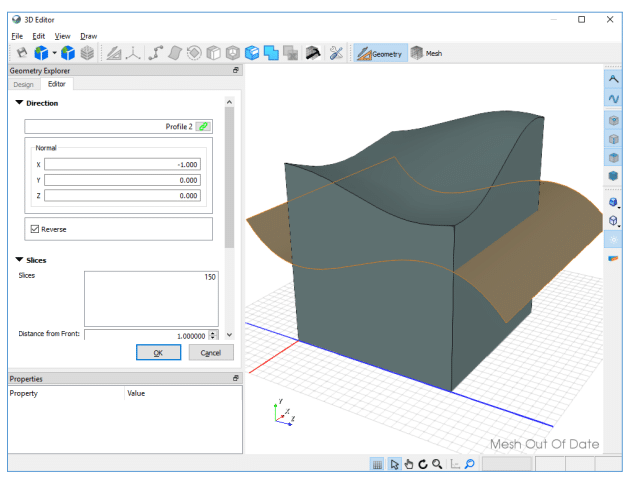
Select the sheet body under Geometry in the tree view and then click on the Cut icon. Use the same cutting operation as you did previously (the Cut and Remove Tool represented by the crescent moon) and click OK. Your model will have two solids separated by an undulating contact with correct surface topography at the top.
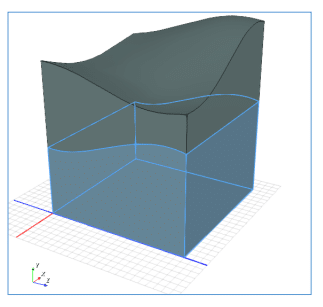
We will now create a circular tunnel that winds through the model. First, we will create an inclined construction plane on which to draw our tunnel path. Make sure the Vertex selection icon is highlighted. Rotate your model (press Ctrl and Shift, and drag with the middle mouse button) so you can see the entire bottom face. Turn off the background grid by deselecting the grid icon at the bottom of the screen. Press the Plane icon, click in the First entity edit box to make it active, and then click on the corner points on the bottom plane in the order shown by the yellow numbers in the following figure. (If you select the corners in a different order than this, the local x-y plane axes will be different from those described in this example.)
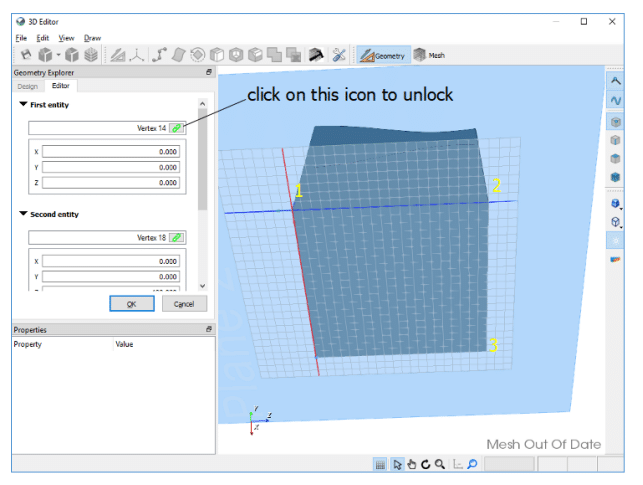
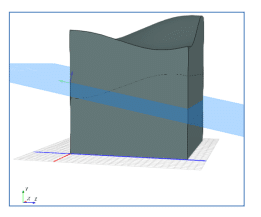
The three points define a unique plane. Before hitting OK, we want to modify our plane. Unlock each vertex to edit their positions. For vertex 1, change the y position to 60. For vertices 2 and 3, change the y position to 40. We now have an inclined construction plane that cuts across our soil contact.
Creating a Sweeping Tunnel
We will sketch a tunnel path on this construction plane. Right-click on the plane you just created and select Sketch. Draw a spline with control points at the local (x,y) coordinates: (50,-150), (80,-90), (50,-30), (30,-10), and (30,50). Click OK.
We will now create a circular sketch, perpendicular to the tunnel path. This sketch will be swept along the tunnel path to produce our circular tunnel. First, we need to create a construction plane, near the starting point of our tunnel, that is perpendicular to our spline tunnel path. Click the Plane icon and select a point near the upper end of the tunnel path (with the highest elevation or y value) you just drew, but do not select the end point. We want to select a position near the end so the plane logic understands we are selecting a line segment. Click OK.
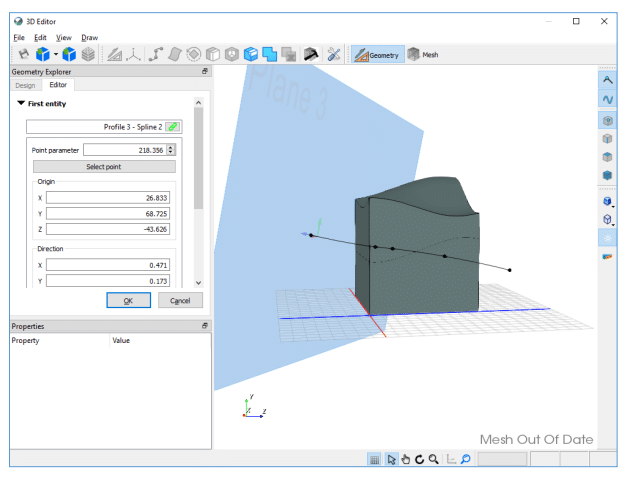
Right-click on the plane you just created and select Sketch. Zoom to the local (x,y) origin (where the green and red lines cross) and sketch a circle with a center at (0,0) and a radius of 5 m. Click OK.
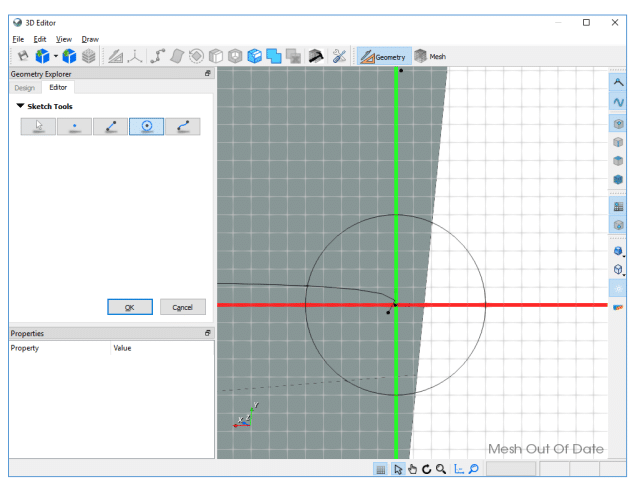
We will now sweep this circle along the tunnel path. Right-click on the circle profile you just created (in the Design History tree) and select Sweep. Select the tunnel path (the curved sketch line that cuts through your model) as the Path. Uncheck the Close Caps option so there are no endcaps placed on the tunnel. Click OK.
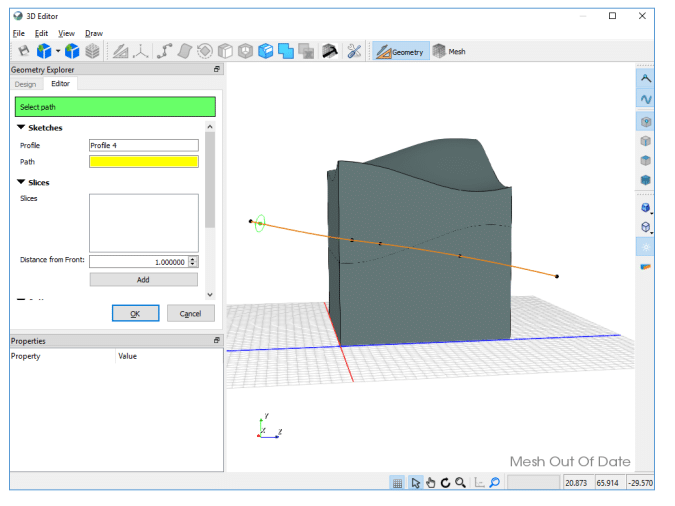
You should now have 2 solids and 2 sheets in the Geometry list. Because the tunnel does not have end caps, it is open and considered a sheet instead of a solid body. Multiselect the two sheets bodies representing the tunnel (hold down the Ctrl key while clicking on the sheets in the Geometry list). Right-click on the selected sheets, go to Cut, and use the same cut operation as before (the crescent moon).
Click on each solid in the Geometry list and assign different materials to each one.
Multiselect the two solids representing the tunnel segments in the Geometry list, and in the Properties window under Mesh, set the Constraint Type to Edge Length with a value of 2.0. This will inform the mesh generator to create elements with approximate edge lengths of 2 m in the vicinity of the tunnel.
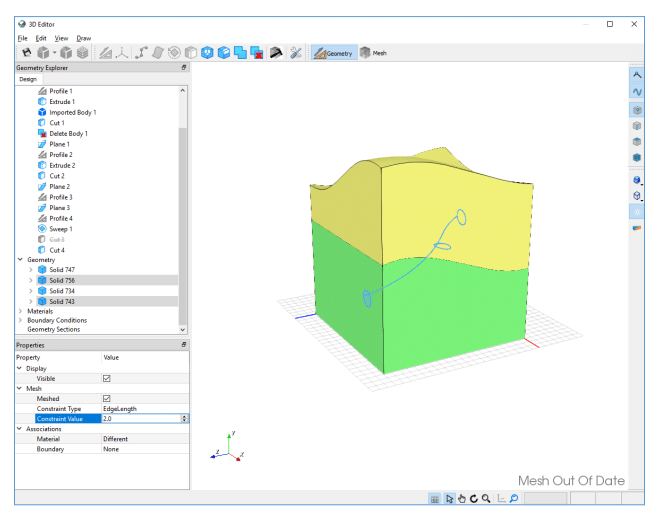
Click on the Generate Mesh icon and use the following settings.
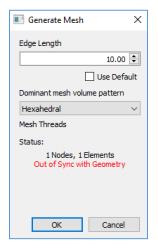
In Mesh View, select the solid in the Geometry list that corresponds to the topmost solid in your model. Set its opacity in the Properties window (in Mesh View only) to 0.2 so we can see through it to the inside of the model.
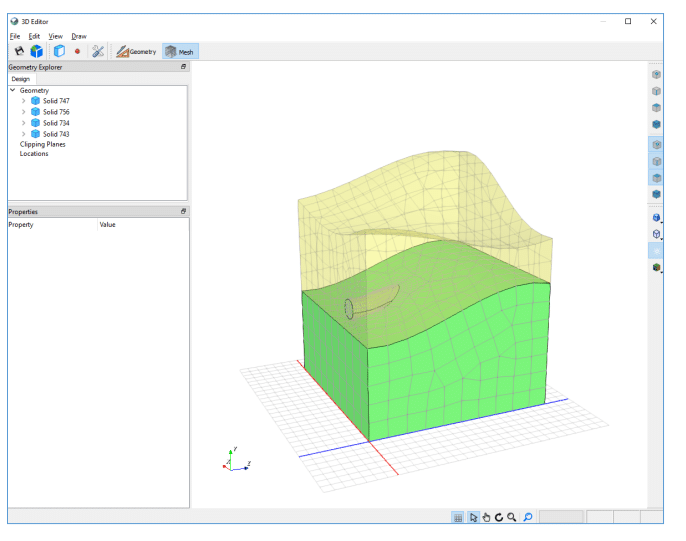
Now close the 3D editor and save the file as ‘Imported Surfaces and Swept Sketches.gsz’.


