Surface, in-pit, and underground geological maps are an important source of information for the continuous updating of your model. These maps help refine your understanding of the location of faults, mineralisation, and lithological surfaces. Keeping geological surfaces up to date with accurate mapping data is an important part of ore control that informs development and stope planning, as well as drill targeting.
In this guide we’ll show how to snap (or influence) a surface with mapped points. This example shows how to add points into the hanging-wall (HW) and footwall (FW) of a vein, but the same technique could be used for any surface within Leapfrog.
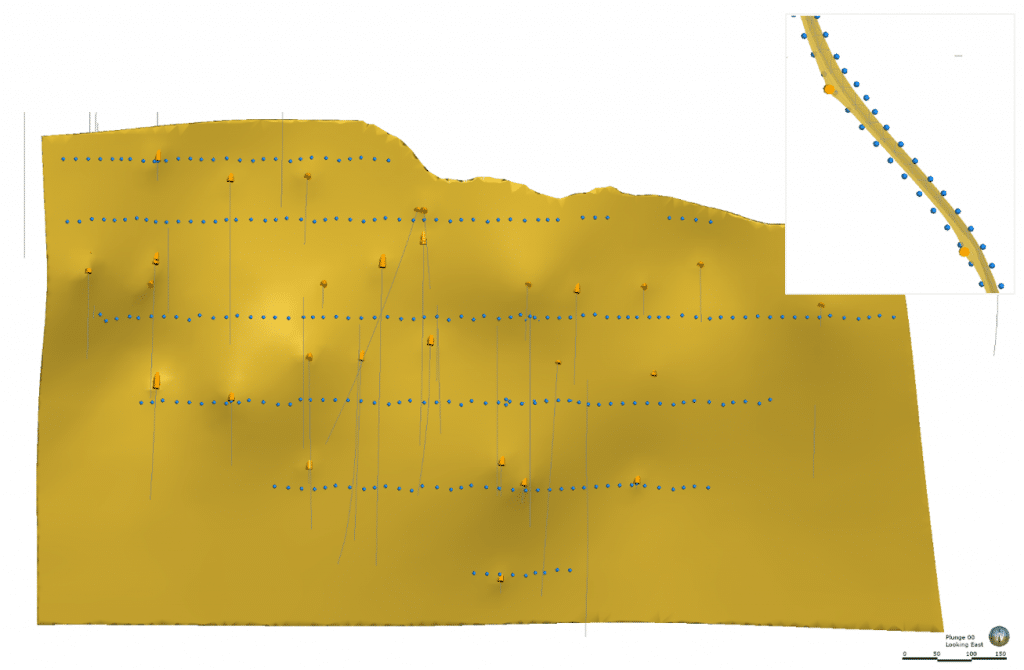
In the image below we have several levels of underground development with vein HW and FW contacts mapped on each level. The inset shows a plan view example of a vein which hasn’t yet been snapped to mapping points.
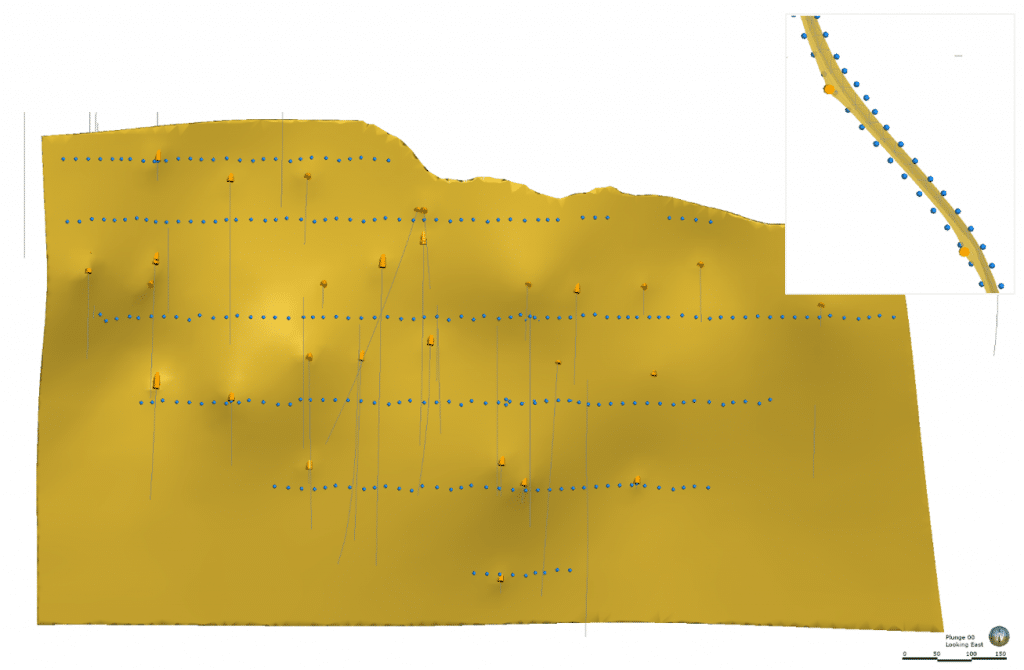
In Leapfrog Geo, a vein is a type of contact surface which crosscuts and removes existing lithologies and replaces them with the vein lithology inside a boundary that is defined by the HW and FW surfaces. These HW and FW surfaces are constructed from selected input data and can be refined independently of one another to include additional data such as mapping points.
For this guide we have used the mapping data as a points file (rather than as a string/polyline) where the required fields are only X, Y, and Z. Categorical information in an additional column is also very useful if available, e.g. lithology/mineralisation/fault classification.
These points should be imported into the Points folder in Leapfrog Geo, we have called it Mapping_points. In this workflow any subsequent mapping information can simply be reloaded or appended into the same points object in the Project Tree.
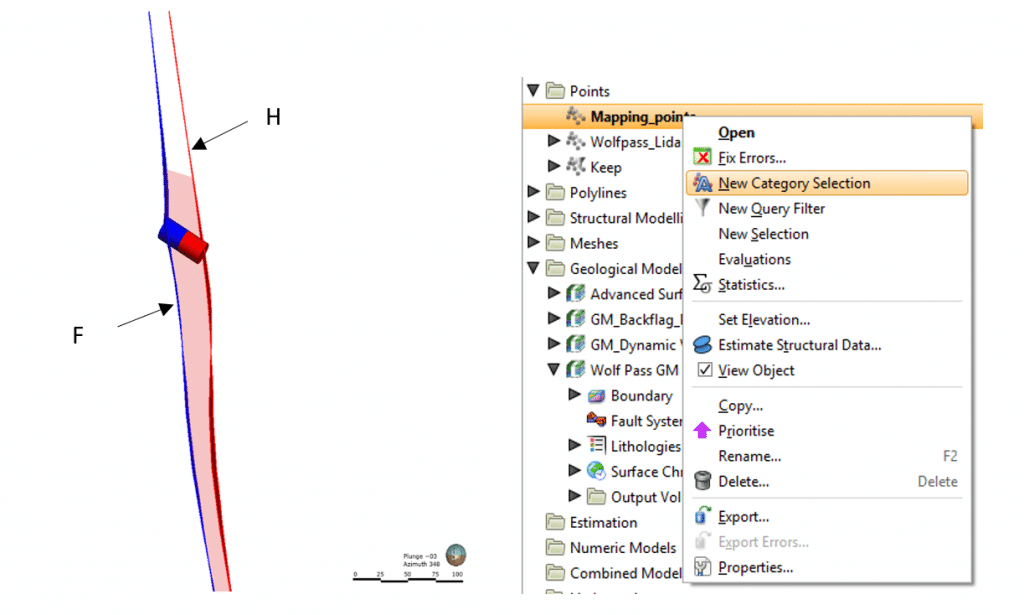
The first step after importing the points is to separate out different individual geological features – in this example the HW and HW of the vein. To do this we’ll use a Category Selection, this is very similar to the Interval Selection functionality on drillhole intervals.
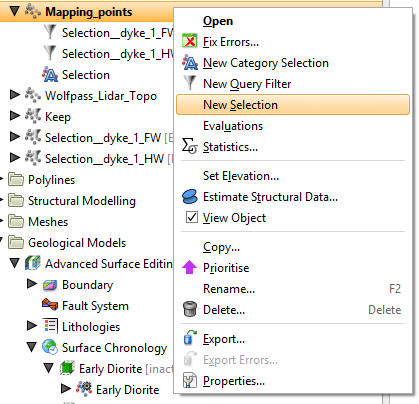
Right-click on the Mapping_points and select New Category Selection.
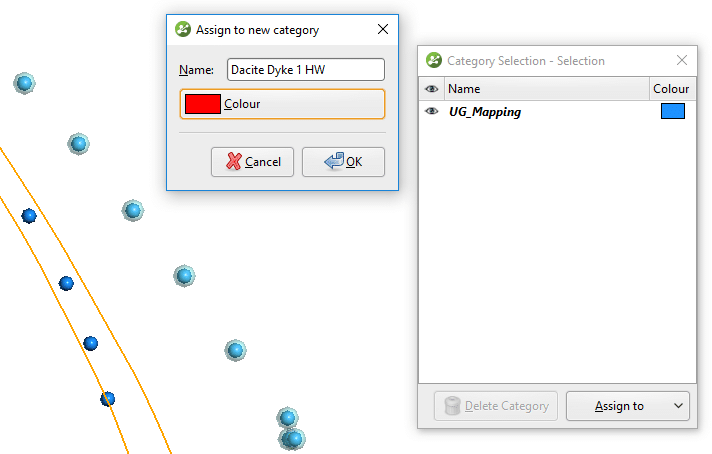
The source column can be <none> (or it could be an imported categorical information column if that’s available). Click OK. A Category Selection window will pop up and the selection tools will now be available in the toolbar.
Use the Select points with a stroke tool to select the points which belong to a specific feature, e.g. the points belonging to the HW of the vein.
Use the Assign to dropdown to assign these points to a new category and Save the Category Selection column. Repeat this process for all geological features.
After saving the Category Selection, close out of the editor. We’ll now create a New Selection – this will allow us to pull out one of the new categories that we’ve created and use only these HW points for Dacite Dyke 1. Right-click on Mapping_points in the Project Tree and choose New Selection from the list.
Change the query to use a New Query and click on the Query Builder to bring up options. Using the drop-down arrows, choose Mapping_points.Selection as the Column, choose Test = is, and add in the value which matches the feature – Dacite Dyke 1 HW in this case. Click OK and change the name to something appropriate like Selection_Dacite_Dyke_1_HW, click OK again.
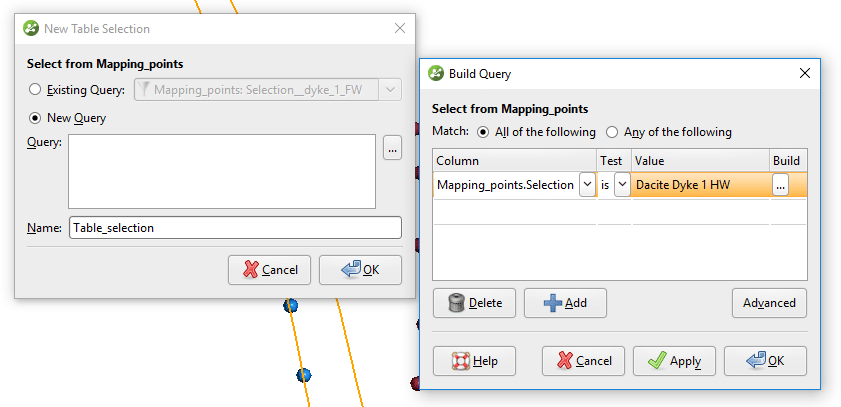
This will create a new object in the Points folder in the project tree – a little funnel indicates that it is filtered data.
This filtered data is now dynamically linked to the category selection. As the raw data and the category selection are updated, this will flow through to the query filter and selection file to save time on repetitive tasks.
We can now add these filtered points into the vein in the Geological Model Surface Chronology. Expand the vein in the Project Tree to find the Hanging-wall object. Right-click > Add > Points and choose the Selection_Dacite_Dyke_1_HW (table selection) object. This will dynamically update the vein to include these points.
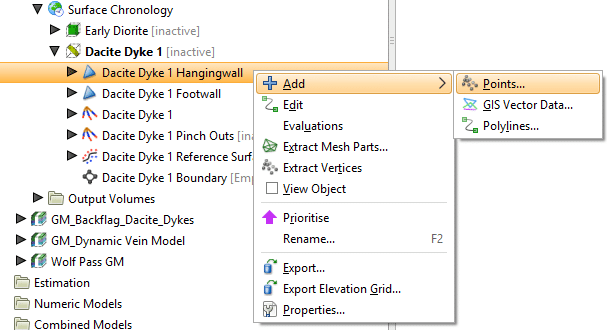
Repeat this process for the FW points and any other veins or geological features that have been categorized.
The vein, which was previously based off an interval selection on the drillholes, has now been updated to include the mapped HW and FW points as well.
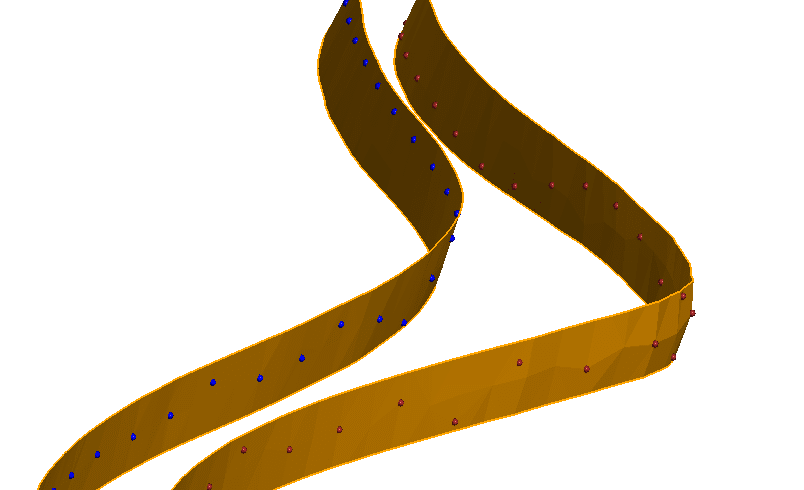
The Category Selection can be updated and added to at any time to allow for dynamic updating of the vein/surface with the latest mapping information.
Now we will review how the points are being included in the surface. When multiple data inputs are added to the same surface it is a good idea to check both the snapping and boundary filtering settings because the default conditions might not be ideal.
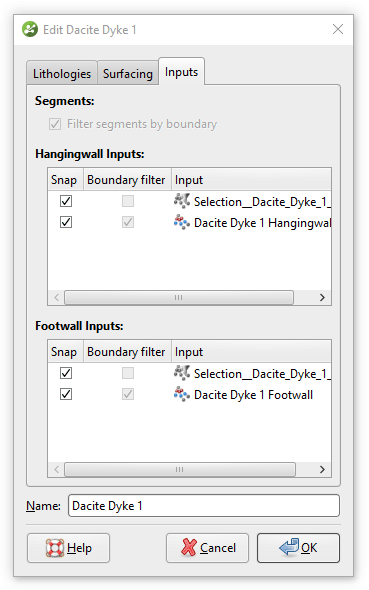
Review the snapping settings within the Surfacing tab of the vein parameters to ensure that snapping is ticked on for the added points. Custom snapping can be used to individually choose which data is snapped to.
Note: you should always seriously consider whether snapping to the data is necessary. Snapping means that you are placing equal emphasis on your added data (mapped data) as to your sampled data.
Unticking the snap box will mean that the points are used as a guide for the surface but not snapped to exactly.
After this additional data has been added in, it may also be prudent to review and consider the surface resolution to ensure that it is still suitable. Adding more data and expecting the surface to snap to it may take more triangles to do this than was needed before. There is also the option of ticking on adaptive resolution.
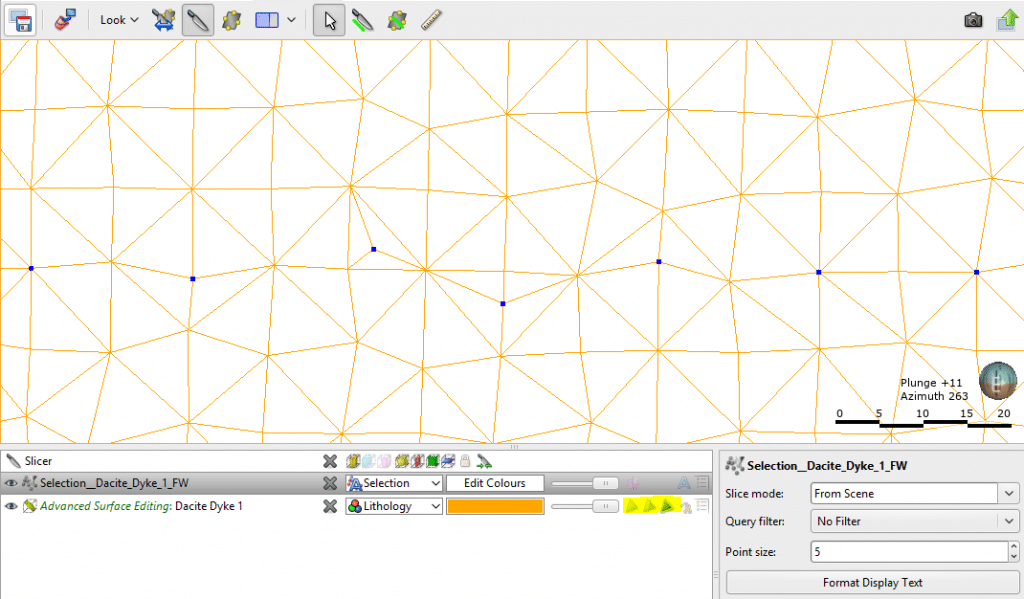
To visually validate that the mapping points have been snapped to, adjust the mesh display settings in the Shape List using the triangle display option (see image) to only Show edges. If points are snapped correctly there should be a vertex at each mapping point.
This Leapfrog Geo workflow allows for dynamic updating of geological models based on any kind of point data (vertices extracted from survey pick-ups could also be used). Once the selections and filters are set up it is an easy process to reload the raw mapping data as new information becomes available, ensuring that models are always up to date. The category selection tool allows for easy editing, with updates and changes flowing directly through to the surfaces within the geological model.
Leapfrog Geo’s dynamic workflows enhance the geological modelling process, allowing geologists to monitor underground vein geometry and position in rapid time to aid with reducing dilution and assist mine development and stope design.


