Introduction
This is the third of four examples demonstrating the basics of setting up three-dimensional geometries in BUILD3D. This example is a continuation of the second example from this series, and demonstrates how to create models using the non-default construction planes and how to assign boundary conditions to a portion of a face using the imprinting operation.
Working with Construction Planes
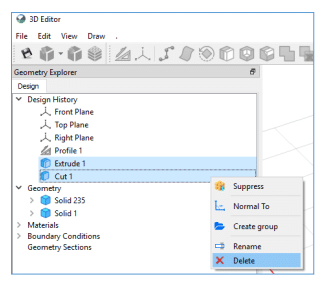
Open the previous example, ‘Implicit and Explicit Boolean Logic.gsz’ in GeoStudio, and save it as ‘Construction Planes and Imprinting.gsz’. Open the 3D editor from the menu by going to Define – Launch BUILD3D. Hold down the Ctrl key to multi-select items and click on Extrude 1 and Cut 1. Then select Delete in the context menu to remove these features created in the previous example. The only remaining feature should be Profile 1 under Design History.
Right-click on Profile 1 and select Edit. Using the arrow sketch tool, select the circle and press the Delete key. Click OK to accept your changes. Right-click on Profile 1 and Extrude a 1 m slice using the default extrusion settings. Press OK to close the Editor tab. Now we have a single brick-shaped solid in the model. Make sure the Face selection icon is active in the right toolbar and select the Plane icon.
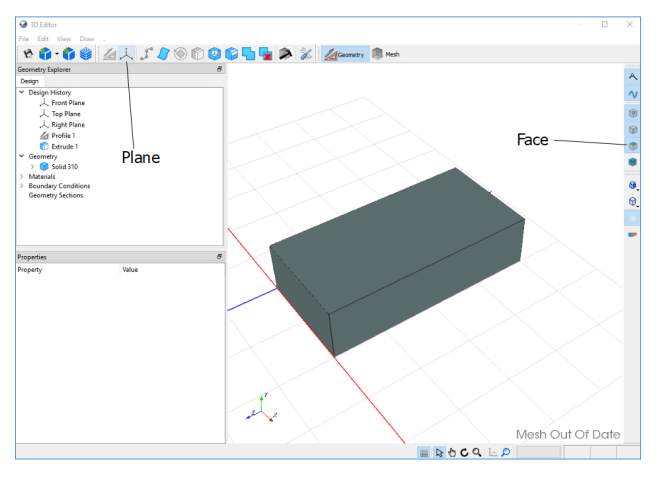
In the Geometry Explorer a construction plane editor opens. This editor expects geometric objects as input. Click in the First Entity edit box and then select the uppermost surface, representing y=1, of the 3D brick. Select OK in the Geometry Explorer property sheet. This creates a construction plane corresponding to the y=1 plane and the corresponding feature, Plane 1, appears in the Design History. Right-click on Plane 1 in the Design History and select Sketch. We can now sketch points, lines, curves, or circles on this plane.
Sketch a circle with a centre at x=1, y=2, and a radius of 1, as shown by the tooltip. It is important to note that in sketch mode, you are drawing on a local plane with local (x,y) coordinates that may not coincide with the global (x,y,z) coordinates. We are able to see objects that were created prior to this sketch. In this example we can see the brick solid, and can snap to positions where this solid intersects the sketch plane. Move your mouse near the brick’s edge while drawing the circle and the tooltip will display ‘OSnapped’ indicating it will snap to the underlying object when the left mouse button is pressed.
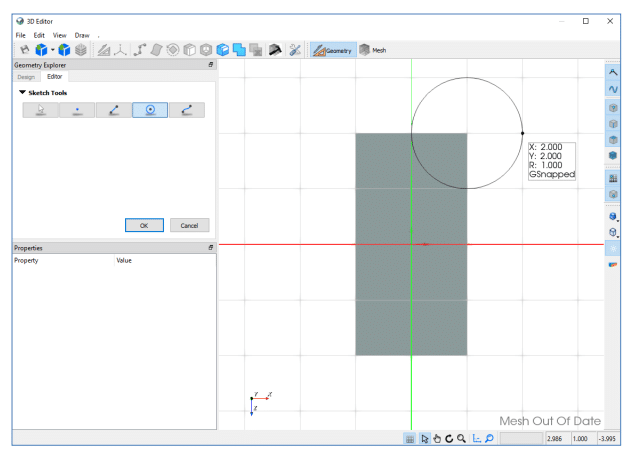
You can also modify your viewpoint by rotating or zooming. Though the viewpoint has changed, you are still restricted to drawing on the selected sketch plane. To restore the view such that it is orthogonal to the sketch plane, click the Normal To icon at the bottom of the screen next to the blue looking glass. Select OK to accept the sketched circle. You model should appear similar to that shown below.
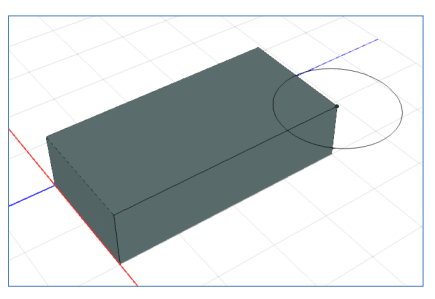
Click on Profile 2, the circle we just sketched, and Extrude it. Make a single slice of length 2, by changing the ‘Distance from Front’ to 2, pressing Add, and then deleting the default slice that was created.
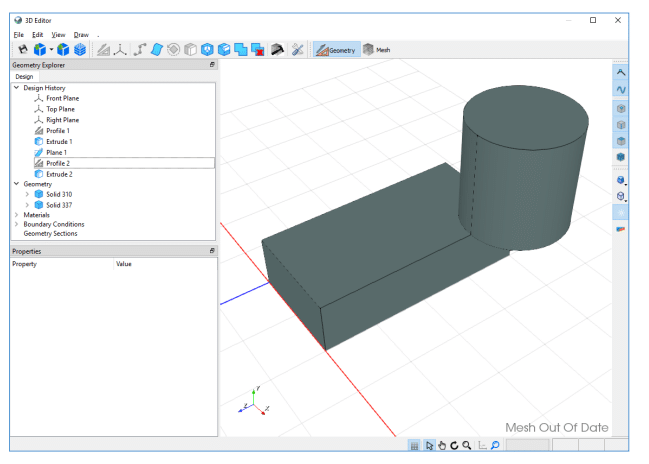
Hover your mouse over the top face of the cylinder. The lower right of the screen shows the current mouse position in world coordinates. Notice that the top of the cylinder is at y=3 because we created a cylinder with a length of 2 m, on top of a 1 m thick brick.
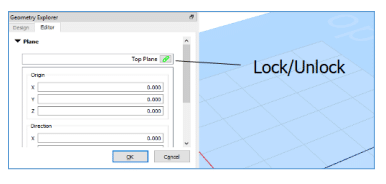
Right-click on Profile 1 and select Edit Plane. This allows us to adjust the position and orientation of the construction plane that our first sketch was created on. The plane is currently locked to the Top Plane. We can unlock it by pressing on the two green chain links. The green links should change to a broken red link indicating that this plane is now independent of the Top Plane. We are now free to adjust this working plane. Change the y position of the origin to 1 and press OK.
Hover your mouse over the top surface of the brick and over the top surface of the cylinder. They’ve both moved, in tandem, up 1 m. The Profile 2 plane is locked to the top surface of the brick and therefore moves wherever the brick moves. You can experiment with this by unlocking the Profile 2 plane so that it moves independently of the brick (but save your model first so you can continue this example).
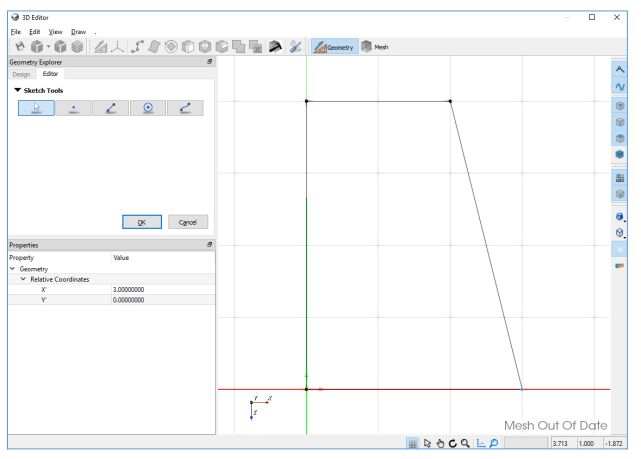
Right-click on Profile 1 in the Design History and select Edit to modify the sketch. With the arrow icon selected in the Sketch Tools, click and drag the lower right corner of the rectangle over 1 m as shown below and click OK.
Your model should look similar to that shown below.
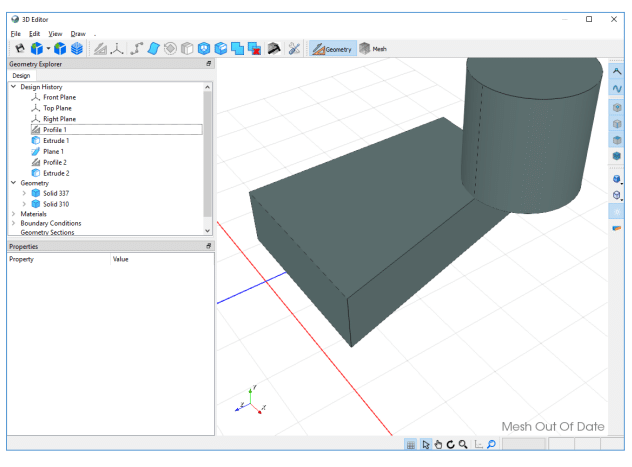
Create a construction plane on the face shown below by clicking on the Plane icon and selecting this face. Plane 2 appears in the Design History.
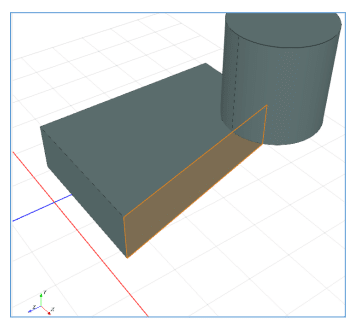
Select the Document Settings icon (the screwdriver and wrench) and set the Grid Cell Size to 0.1 m. A finer grid is rendered on your screen and allows snapping to positions that are multiples of 0.1 m. The Snap Tolerance represents a pixel tolerance such that when the tolerance is set to 2, your mouse will snap to a grid line when it is within 2 pixels.
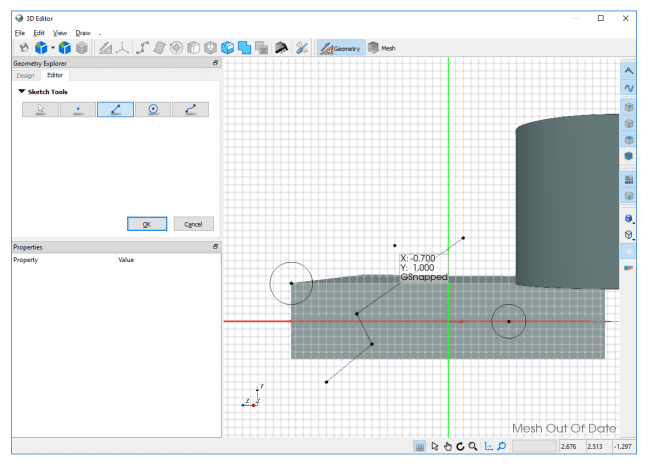
Click on Plane 2 and select Sketch. You will now be drawing directly on the plane highlighted in the previous image. Sketch two circles and a jagged line approximately as shown in the picture below. One circle extends past the boundary of the underlying face, the other circle is completely inside the face, and the jagged line cuts across and past the face boundaries. Select OK.
Imprint Functionality
We will use these profile shapes to “imprint a boundary” on the underlying face, allowing us to apply boundary conditions to arbitrary locations on a face. Imprinting only works with items in the Geometry list (Solids, Faces, Edges, Vertices). In order to make our sketched items useable in the Geometry list, click on Profile 3 and select Make Bodies (use the default settings and select OK). Our sketched lines now appear as Wire bodies in the Geometry list.
Make sure the Body selection icon is selected and the Face, Edge, Vertex selection are off. Select the Imprint icon to open the imprinting property sheet. Click in the Tools edit box and then click on each Wire body in your 3D view. Check the Remove Tool Bodies option to remove the Wire bodies after the imprinting operation is complete. The Wires are used as imprinting “tools” (i.e., they will imprint themselves onto another body). Click in the Arguments edit box, make sure the Face selection icon is turned on, and select the face of the brick solid that the wires are coplanar with.
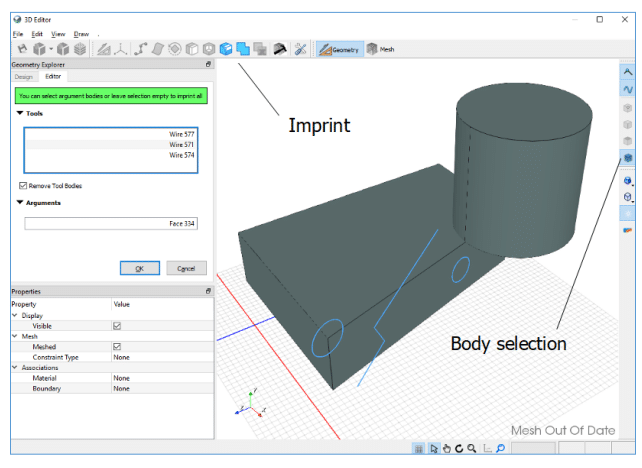
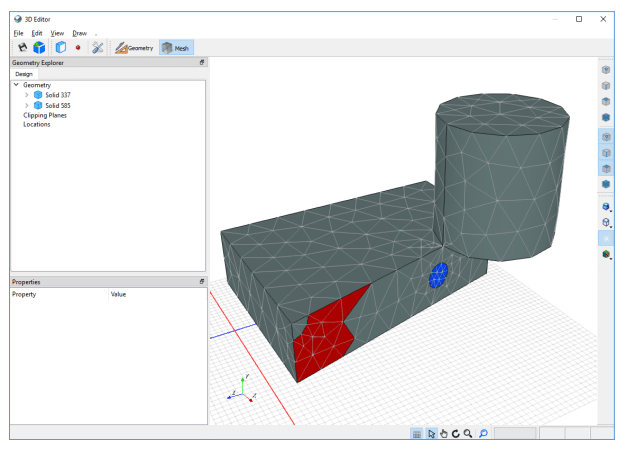
You will notice that the imprinting operation resulted in the brick face being split into multiple pieces. We can assign boundary conditions to any of these face portions. Assign head boundary conditions to some of these faces as shown in the following image.

Click on the Generate Mesh icon. Uncheck the Use Default option and set an Edge Length of 0.5 m for the mesh. Click OK to generate your mesh. The mesh conforms to the imprinted boundary conditions you set. Save your model.
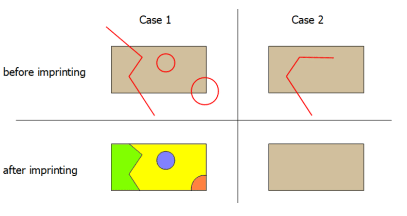
Note that imprinting on a face only works with bodies that cut a face into distinct pieces. The following figure shows two cases where we would like to imprint the shapes outlined in red on the rectangular face. In Case 1, the red tool bodies cut the face into distinct pieces and the imprint operation results in the rectangular face being split into 4 faces (green, yellow, purple, and orange faces). With Case 2, the red imprinting tool does not split the face into distinct parts so the imprint operation has no effect on this face.
Now you can experiment with imprinting. Imprint the cylinder solid onto the brick solid or vice versa. Select Remove Tool Bodies to remove the cylinder after the imprinting operation. Right-click to Delete your new Imprint feature or Edit it.
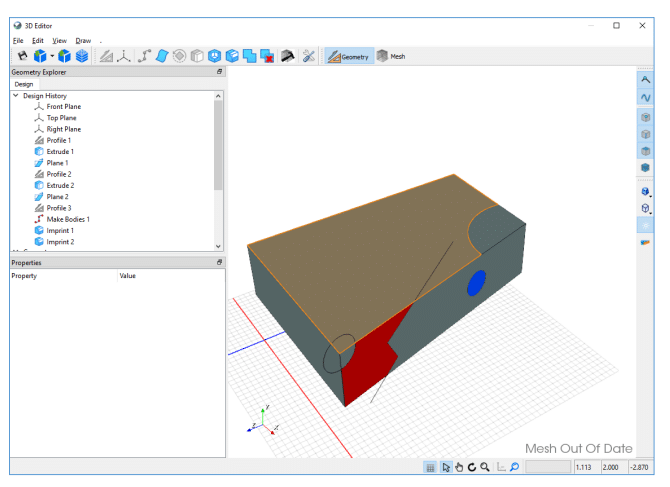
You can also experiment with the Plane functionality by selecting the Plane icon and then clicking on three distinct points to create another construction plane. Sketch a closed curve on this plane and extrude it.


